Upgrading to a smart thermostat is a proactive step many homeowners are taking in the push towards energy efficiency and smart home integration. A Hive smart thermostat offers convenience and control over home heating systems, enabling users to create a more comfortable and cost-effective living environment. By utilising a Hive smart thermostat, homeowners can adjust their heating settings remotely via a mobile app, resulting in more efficient energy use and reduced utility bills.
The installation process of a Hive thermostat is designed to be straightforward so that the homeowner or a professional installer can undertake it. Ensuring the device is compatible with the existing boiler is critical. After confirming compatibility, the physical installation involves connecting the Hive Hub to the broadband router, fitting the power cable, and integrating the system with the central heating setup. It’s important to note that safety is paramount; the mains supply to the central heating should be turned off before beginning any work.
Key Takeaways
- A Hive smart thermostat can enhance energy efficiency and enable remote heating control.
- Safety and device compatibility are crucial considerations before beginning installation.
- Proper configuration is essential for optimising the performance of a Hive smart thermostat.
Understanding Smart Thermostats
Smart thermostats, such as Hive Active Heating, offer advanced features for energy management and can be controlled remotely. They represent a significant step forward in terms of convenience and energy efficiency.
Benefits of Hive Thermostats
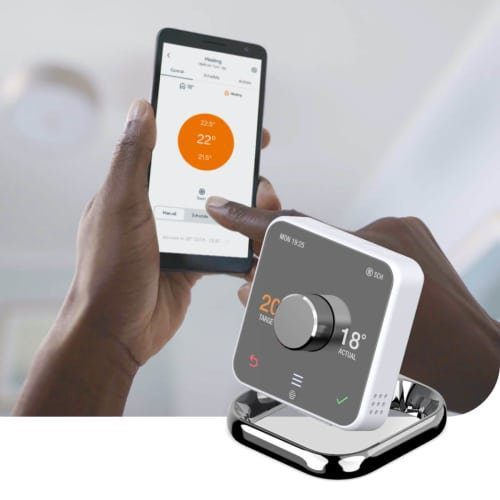
- Remote Control: Using a smartphone app, users can adjust their heating and hot water settings from anywhere.
- Energy Efficiency: Hive thermostats can help save money on energy bills by allowing users to set precise heating schedules and by learning their heating preferences over time.
Hive vs Other Smart Thermostats
- Hive Active Heating stands out by seamlessly integrating with British heating systems. It offers a user-friendly interface and is designed for easy installation.
- Nest and Tado are competitors that also offer smart thermostats. While they have similar energy-saving potentials, the choice between them can depend on factors such as brand compatibility with your home heating system and the specific features you prioritise.
Preparing for Installation
Before installing a Hive Smart Thermostat, one must ensure that the boiler is compatible with the smart home technology and collect all the necessary tools.
Checking Boiler Compatibility
The first step in preparing to install a Hive Smart Thermostat is to confirm that the device is compatible with the existing boiler system. Hive heating controls are designed to work with most gas, oil, and combi boilers; however, checking the manufacturer’s specifications is essential.
- Gas boilers: Check for a standard wall-mounted system.
- Oil boilers: Verify if the boiler has a 230V switch.
- Combi boilers: Make sure the boiler supports on/off control.
Refer to the wiring diagram of your current thermostat to understand the existing setup and adapt the Hive Thermostat accordingly. It is crucial to confirm that the model of your new boiler supports smart home integration for a seamless installation.
Gathering Necessary Tools
Once compatibility is confirmed, assembling the right tools ensures a smooth installation process. A standard toolkit for this task typically includes:
- Screwdriver: Needed for securing the thermostat to the wall and wiring connections.
- Drill: You may be required to make new holes for mounting the thermostat base plate.
- Wire: Additional wiring might be needed depending on the distance from the boiler to the thermostat location.
Remember that turning off the mains supply to the central heating is a safety prerequisite before starting any work. This measure prevents electrical accidents while handling live wires during installation.
Installing the Hive Thermostat
When installing the Hive Smart Thermostat, it is crucial to ensure that the receiver is mounted properly, the wires are connected correctly, and the Hive Hub is set up to manage the heating system efficiently.
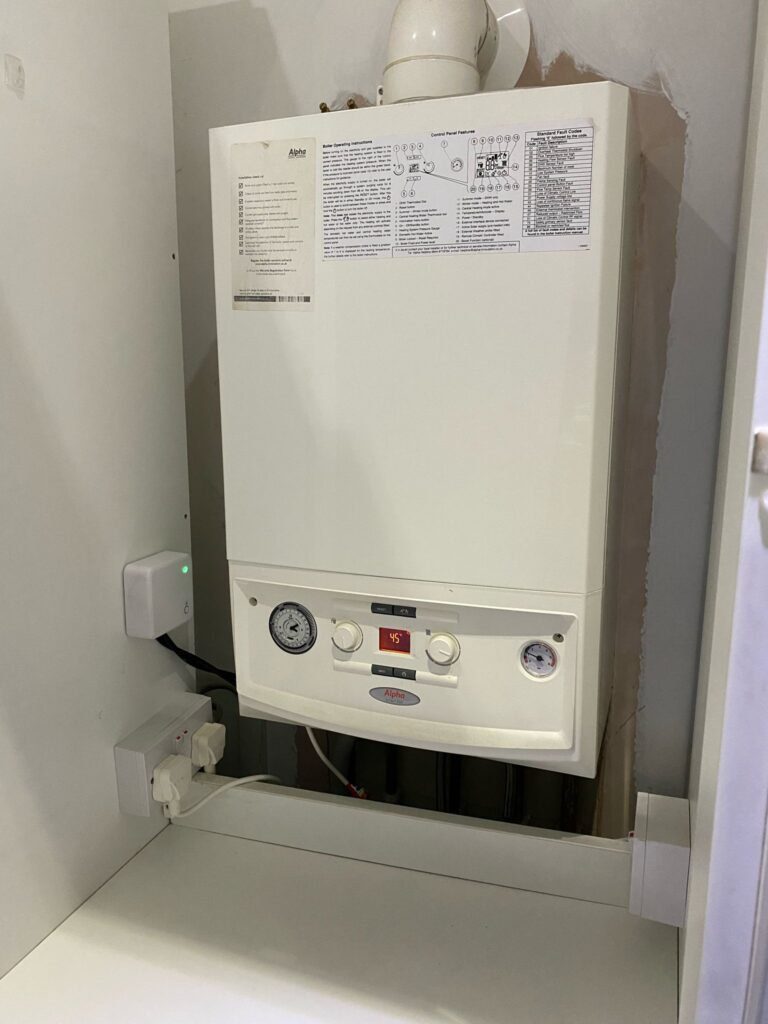
Mounting the Receiver
The receiver should be securely mounted on the wall near the boiler. The location should be within reach of the boiler’s wiring terminals to facilitate a straightforward connection. The receiver must be mounted steadily for optimal wireless communication with the thermostat.
Connecting the Wires
When connecting the wires from the boiler to the receiver, ensure the mains power supply is off. The receiver typically has clearly labelled terminals such as the ‘R’ terminal (commonly used for heating call) and the ‘N’ terminal (neutral). The exact wiring setup may depend on the boiler model:
- For Combination Boilers:
Terminal Connection L Live wire N Neutral wire R Heating call wire - For Conventional Boilers:
Terminal Connection L Live wire N Neutral wire R Heating call wire HW Hot water call wire
Wiring should be carried out in accordance with the detailed instructions provided with the Hive thermostat, and it is recommended that a professional undertakes the installation to ensure it is done correctly and safely.
Setting Up the Hive Hub
To set up the Hive Hub, one must connect it to the home’s broadband router using the provided network cable. Then, insert the power cable into the hub and plug it into a power socket. Before proceeding to pair the hub with the thermostat and the receiver, verify that the mains power supply is switched off. Once powered on, follow the manufacturer’s instructions to complete the pairing process to enable wireless communication with the heating system.
Configuring the Hive System
Configuring the Hive Smart Thermostat is a straightforward process, involving pairing it with various smart devices and installing the necessary application on a smartphone or tablet. Proper configuration is critical for taking full control of one’s heating schedule via the internet.
Pairing with Smart Devices
To integrate the Hive thermostat with smart devices around the home, one firstly ensures that the Hive Hub is connected to the home broadband router using the supplied network cable. After the Hub is powered up, pairing the smart thermostat with it allows for seamless communication over the internet. Once paired, the thermostat can interact with other smart home devices like Amazon Alexa and Google Assistant, enabling voice command capabilities. The homeowner can issue commands such as “turn the heating on” or “adjust my heating schedule” to control the system hands-free.
Installing the Hive App
Upon successful pairing with smart devices, the homeowner is to install the Hive app on their smartphone or tablet. This app serves as the main control centre for managing the heating schedule and other settings. By following these steps, the user gains the ability to control the thermostat remotely:
- Download the Hive app from the respective app store.
- Register for an account or log in if an existing account is already set up.
- Follow the in-app instructions to connect the app to the Hive Hub.
Once the app is connected, the user can set a heating schedule directly from their device, ensuring that the heating is on only when necessary, which can lead to energy savings. The interface of the Hive app is designed for ease of use, offering a straightforward way to modify settings or to check current temperatures, whether at home or away.
Optimising Home Heating Efficiency
To maximise energy savings and reduce energy bills, homeowners must focus on smart scheduling and regular maintenance of their heating systems. These elements are crucial for efficient energy usage and managing hot water and central heating in a cost-effective manner.
Smart Scheduling
Smart thermostats, like the Hive, allow users to control their central heating and hot water schedule with precision. By setting a programmer to heat the home only when necessary, users prevent wastage of energy, thus saving on energy bills. Features such as geo-location ensure heating is activated based on the homeowner’s location, enhancing the effectiveness of energy saving measures.
- Peak hours: Avoid heating during peak energy tariff times to save costs.
- Personal schedules: Adjust temperatures based on daily routines.
- Zonal heating: Heat only the areas in use for increased efficiency.
Regular Maintenance Tips
Regular maintenance is vital for any heating system to operate at peak efficiency. Homeowners are advised to check and replace batteries, typically AA batteries, in their smart thermostat units to ensure continuous operation of smart features.
- Boiler servicing: Have a technician service the boiler annually.
- System check-ups: Ensure all components function correctly and efficiently.
- Insulation review: Proper insulation reduces unnecessary energy usage.
Through smart scheduling and diligent maintenance, homeowners can optimise home heating systems, thereby improving efficiency and reducing energy bills.
Frequently Asked Questions
In this section, one can find practical information regarding the setup and troubleshooting for a Hive smart thermostat when connecting it to a combination boiler.
What are the steps to wire a receiver for a Hive smart thermostat to a combination boiler?
To wire a receiver, one must first turn off the boiler and central heating system. Then, the existing thermostat should be removed, ensuring wires are correctly identified. The receiver is wired into the boiler using the status and switch terminals, following the manufacturer’s guidelines.
Can you provide a wiring diagram to assist with the installation of a Hive thermostat?
Whilst a wiring diagram can be immensely helpful, it is recommended to refer to the official Hive installation manual for the specific model as it provides the most accurate and safe wiring instructions tailored for your thermostat.
Is it possible to connect any smart thermostat to my particular model of boiler?
Compatibility is paramount; not every smart thermostat may be suitable for a particular boiler model. Before purchase, one should check the thermostat’s specifications against the boiler’s model to ensure they are compatible.
What should I check if my Hive thermostat is not establishing a connection with the boiler?
One should verify the thermostat’s receiver is in pairing mode and that the boiler, thermostat, and hub are all powered. Check the internet connection as it’s essential for the thermostat’s proper functioning. In some cases, it may be necessary to reset the devices to re-establish a connection.
Where can I find the installation manual for a Hive smart thermostat?
The installation manual for a Hive smart thermostat is usually provided in the box with the device. Alternatively, these manuals can also be found and downloaded from the Hive official website.
Are there specific installation instructions for setting up a Hive thermostat with a combination boiler?
Yes, there are specific instructions for installation with a combination boiler, which are included in the Hive thermostat installation manual. It is vital to follow these instructions carefully to ensure a correct and safe installation.

